
티스토리 뷰
2) 파일 업로드 구현하기
실습
- 실습은 이전에 했던 프로젝트인 guestbook에 이어서 진행합니다.
- maven pom.xml에 파일 업로드와 관련된 라이브러리를 추가해야 합니다.
- commons-fileupload, commons-io 추가.
|
<dependency> <groupId>commons-fileupload</groupId> <artifactId>commons-fileupload</artifactId> <version>1.2.1</version> </dependency> <dependency> <groupId>commons-io</groupId> <artifactId>commons-io</artifactId> <version>1.4</version> </dependency> |
- DispathcerServlet에게 멀티파트 요청이 올경우 파일 업로드 처리가 될 수 있도록 MultipartResolver객체를 등록합니다.
- 최대 10메가 크기의 파일이 저장되도록 설정하였습니다.
- DispatcherServlet에 이런 내용들을 알려주기 위해서는 config 안에 있는 WebMvcContextConfiguration에 Bean을 추가합니다.
WebMvcContextConfiguration.java
|
@Bean public MultipartResolver multipartResolver() { org.springframework.web.multipart.commons.CommonsMultipartResolver multipartResolver = new org.springframework.web.multipart.commons.CommonsMultipartResolver(); multipartResolver.setMaxUploadSize(10485760); // 1024 * 1024 * 10 return multipartResolver; } |
- 이제 파일을 업로드 할 수 있는 form을 views에 작성합니다. form의 method와 enctype을 다음과 같이 지정합니다. 또한 input 태그의 타입을 file로 지정합니다.
uploadform.jsp
|
<%@ page language="java" contentType="text/html; charset=UTF-8" pageEncoding="UTF-8"%> <!DOCTYPE html PUBLIC "-//W3C//DTD HTML 4.01 Transitional//EN" "http://www.w3.org/TR/html4/loose.dtd"> <html> <head> <meta http-equiv="Content-Type" content="text/html; charset=UTF-8"> <title>uploadform</title> </head> <body> <h1>Upload Form</h1> <br><br> <form method="post" action="upload" enctype="multipart/form-data">
file : <input type="file" name="file"><br>
<input type="submit"> </form> </body> </html> |
- 파일 업로드가 성공하면 업로드 성공 메시지를 출력하는 uploadok.jsp파일을 작성합니다.
uploadok.jsp
|
<%@ page language="java" contentType="text/html; charset=UTF-8" pageEncoding="UTF-8"%> <!DOCTYPE html PUBLIC "-//W3C//DTD HTML 4.01 Transitional//EN" "http://www.w3.org/TR/html4/loose.dtd"> <html> <head> <meta http-equiv="Content-Type" content="text/html; charset=UTF-8"> <title>uploadform</title> </head> <body> <h1>파일 업로드 성공</h1> </body> </html> |
- 파일 업로드를 처리하는 FileController를 작성합니다.
- Controller 패키지에 FileController.java를 작성합니다.
FileController.java
|
package kr.or.connect.guestbook.controller;
import java.io.FileOutputStream; import java.io.InputStream;
import org.springframework.stereotype.Controller; import org.springframework.web.bind.annotation.GetMapping; import org.springframework.web.bind.annotation.PostMapping; import org.springframework.web.bind.annotation.RequestParam; import org.springframework.web.multipart.MultipartFile;
@Controller public class FileController {
// get방식으로 요청이 올 경우 업로드 폼을 보여줍니다. @GetMapping("/uploadform") public String uploadform() { return "uploadform"; }
// 실제 파일이 업로드 요청이 들어올 때의 처리 부분 @PostMapping("/upload") public String upload(@RequestParam("file") MultipartFile file) { // 업로드 파일이 MultipartFile 객체로 들어옴 System.out.println("파일 이름 : " + file.getOriginalFilename()); System.out.println("파일 크기 : " + file.getSize());
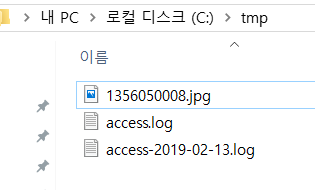
try( // 맥일 경우 //FileOutputStream fos = new FileOutputStream("/tmp/" + file.getOriginalFilename()); // 윈도우일 경우 FileOutputStream fos = new FileOutputStream("c:/tmp/" + file.getOriginalFilename()); InputStream is = file.getInputStream(); ){ int readCount = 0; byte[] buffer = new byte[1024]; while((readCount = is.read(buffer)) != -1){ fos.write(buffer,0,readCount); } }catch(Exception ex){ throw new RuntimeException("file Save Error"); }
return "uploadok"; } } |
- 위와 같은 내용이 작성이 되었다면, 서버를 실행시켜 http://localhost:8080/guestbook/uploadform 을 웹 브라우저로 엽니다.
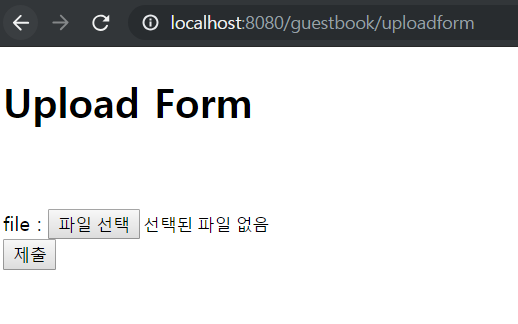
- 파일을 업로드 합니다. 업로드되면 성공페이지로 이동하는 것을 알 수 있습니다.

- c:/tmp 폴더에 가보면 파일이 업로드 된 것을 알 수 있습니다.
생각해보기
- 한 디렉토리에 저장되는 파일의 수는 제한이 있습니다. 파일 업로드를 구현할 때는 파일이 업로드되는 디렉토리의 구조도 중요합니다. 업로드되는 파일을 저장하기 위한 디렉토리 구조를 어떻게 하는 것이 좋을까요? (힌트 : 파일이 업로드되는 날짜 정보를 이용한다.)
- MultipartFile#transferTo() 를 이용해서 실습 코드를 수정해보세요.
참고 자료
[참고링크] Spring MVC File Upload Example Tutorial - Single and Multiple Files - JournalDev
https://www.journaldev.com/2573/spring-mvc-file-upload-example-single-multiple-files
[참고링크] FileUpload – Home
https://commons.apache.org/proper/commons-fileupload/
'부스트코스 웹 프로그래밍 > 6. 웹 앱 개발: 예약서비스 4' 카테고리의 다른 글
| 3. 파일 업로드 & 다운로드 - BE (3) (0) | 2019.08.13 |
|---|---|
| 3. 파일 업로드 & 다운로드 - BE (1) (0) | 2019.08.13 |
| 2. 로깅 - BE (3) (0) | 2019.08.13 |
| 2. 로깅 - BE (2) (0) | 2019.08.13 |
| 2. 로깅 - BE (1) (0) | 2019.08.13 |